This guide explains the complete process in easy language. Whether you want a place to store family photos, share files between computers, create automatic backups, or stream media throughout your home, these steps will help you build a reliable home NAS without unnecessary confusion.
What Is a NAS and Why Do People Use One?
A network-attached storage device is a dedicated storage system that connects directly to your home router instead of connecting to a single computer. Once connected, every authorised device on your home network can access the stored files whenever needed. Unlike an external hard drive that only works when plugged into one computer, a NAS stays connected to the network all the time. This means you can save files from your desktop, laptop, tablet, or smartphone without moving storage devices between them.
Many households use a NAS for everyday tasks such as the following:
- Backing up family photos and videos
- Storing work documents in one location
- Sharing files between multiple computers
- Keeping personal media organized
- Creating automatic backups of important folders
- Accessing files from different rooms in the house
The biggest advantage is convenience. Instead of wondering which device contains a particular file, everything is stored in one organised location.
Understand the Basic Parts of a NAS System
Before starting the setup process, it helps to understand the main components involved. Knowing what each part does makes the installation much easier.
| Component | Purpose |
|---|---|
| NAS Device | The main unit that manages your storage. |
| Hard Drives | Store your files and folders. |
| Router | Connects the NAS to your home network. |
| Ethernet Cable | Provides a stable network connection. |
| Power Adapter | Supplies electricity to the NAS. |
| Computer | Used for the initial setup and management. |
Every NAS model may look slightly different, but these basic components remain almost the same across most systems.
Choose the Best Location Before Installation
Where you place your NAS has a direct impact on its performance and lifespan. Since the device runs continuously, it needs proper airflow and a stable environment.
A good location should be clean, dry, and well ventilated. Avoid placing the NAS inside closed cabinets where heat can build up. Likewise, keep it away from direct sunlight, water sources, or areas with excessive dust. Many home users simply place the NAS on a sturdy shelf near the internet router. This keeps cable lengths short and provides reliable network connectivity.
Install the Storage Drives Carefully
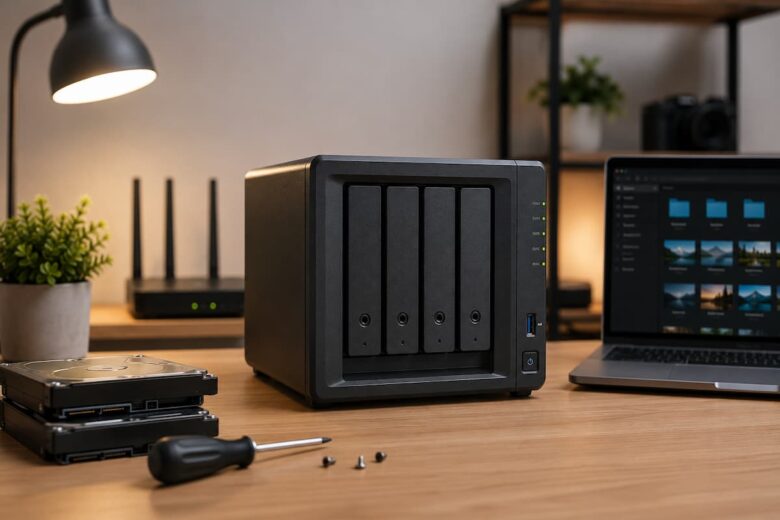
The next step is installing the hard drives into the NAS enclosure. Most modern NAS devices include removable drive trays that make this process straightforward. Open the front panel, slide out each drive tray, secure the storage drive according to the manufacturer’s instructions, and gently slide the tray back into place. Avoid forcing the drives into the slots because they should fit smoothly.
If your NAS supports multiple drives, make sure each drive is fully seated before closing the front panel. Although the process is simple, taking your time during this step helps prevent connection problems later during setup.
Connect Everything to Your Home Network
After installing the drives, it is time to connect the NAS to your home network. Attach the Ethernet cable from the NAS to an available LAN port on your router. Next, connect the power adapter and turn on the device.
The system may take several minutes to complete its first startup. During this time, indicator lights usually blink while the NAS performs internal checks and prepares the installed storage drives. Do not unplug the device during this process. Waiting patiently ensures the initial startup finishes successfully.
Access the NAS Setup Page
Once the NAS has finished starting, the next step is to access its setup page from your computer. Most NAS devices provide an easy way to locate them on your home network through a web browser or a setup utility provided by the manufacturer.
After the device is detected, open its management interface in your browser. The setup wizard will usually guide you through the initial configuration. This includes setting the device name, selecting your preferred language, and creating an administrator account. Choose a strong administrator password that combines uppercase letters, lowercase letters, numbers, and symbols. This account controls the entire NAS, so protecting it is essential.
Create a Storage Volume
Before you can begin storing files, the installed drives must be organised into a storage volume. A volume is the space where your folders and data will be saved. Most NAS systems include a setup wizard that automatically creates a storage volume. If multiple drives are installed, you may also have options for different storage configurations. Beginners often prefer the recommended settings because they balance storage capacity and reliability.
Creating the storage volume may take some time, especially when using large-capacity drives. Allow the process to finish completely before continuing.
| Step | Purpose |
|---|---|
| Select the installed drives | Choose which drives will be used for storage. |
| Create the volume | Prepare the storage space. |
| Format the drives | Make the storage ready for saving files. |
| Wait for completion | Ensure everything is properly initialised. |
Create User Accounts for Family Members
If more than one person will use the NAS, creating separate user accounts is a smart idea. Individual accounts help keep files organised and provide better privacy. Each user can have their own username, password, and personal storage folder. Parents can also limit access for children or guests by assigning different permission levels.
For example, one user may have permission to upload and edit files, while another may only be allowed to view shared documents. Managing user accounts also makes it easier to monitor storage usage and organise backups for each family member.
Set Up Shared Folders
Shared folders allow multiple users or devices to access the same files. They are one of the most useful features of a home NAS. You can create separate folders for different purposes to keep everything organised.
- Family Photos
- Videos
- School Projects
- Work Documents
- Music Collection
- Backups
- Personal Files
Giving each folder a clear name makes it easier to locate files later. You can also decide which users have permission to view or edit each folder.
Configure Automatic Backups
One of the biggest reasons people install a NAS is to protect important files. Automatic backups remove the need to remember copying files manually every week. Most NAS systems allow you to schedule backups from computers on your network. Once configured, new files are copied automatically according to the schedule you choose.
Common backup schedules include:
- Every day
- Every week
- At specific times
- Whenever a computer connects to the network
Automatic backups reduce the risk of losing valuable documents, photos, or videos if a computer experiences hardware problems.
Test File Transfers
Before considering the setup complete, test the system by transferring a few files between your computer and the NAS. Copy a small folder containing documents or photos to one of the shared folders. Then open the same folder from another computer or device connected to your home network.
If the files appear correctly, the NAS is working as expected. Testing also gives you confidence that permissions, storage, and network settings have been configured properly. Once everything works correctly, your NAS is ready for everyday use.
Keep Your NAS Secure
After completing the setup, take a few minutes to improve the security of your NAS. Since it stores valuable personal files, protecting it should become part of your regular routine.
Use a strong password for every user account and avoid sharing administrator credentials with other people. If your NAS supports two-factor authentication, enable it for an extra layer of protection. Also, review user permissions from time to time to make sure each person only has access to the folders they need. Good security habits reduce the chances of accidental file deletion or unauthorised access within your home network.
Perform Regular Maintenance
A NAS requires very little maintenance, but a few simple tasks can help it continue running smoothly for years. Check for system updates regularly, as software updates often include security improvements, bug fixes, and performance enhancements.
It is also helpful to monitor available storage space. When the storage begins to fill up, organise or archive files you no longer use. Keeping enough free space allows the system to operate more efficiently. Occasionally inspect the device for dust buildup around the cooling vents and fans. Cleaning these areas carefully helps maintain proper airflow and prevents unnecessary heat.
Common Mistakes to Avoid
Many first-time users make small mistakes that can easily be avoided. Being aware of these issues makes the setup process smoother.
| Mistake | Better Practice |
|---|---|
| Using weak passwords | Create strong, unique passwords. |
| Ignoring software updates | Install updates regularly. |
| Overfilling storage | Leave free space for better performance. |
| Poor ventilation | Place the NAS in a cool, open location. |
| Skipping backup testing | Verify backups occasionally to ensure they work. |
A little attention to these details can prevent many common problems later.
Troubleshooting Basic Problems
If your NAS is not visible on the network, first check that the Ethernet cable is securely connected and that the router is functioning properly. Restarting both the router and the NAS often resolves temporary connection issues. If file transfers seem slower than expected, make sure you are using a wired network connection whenever possible. Also check whether other devices on the network are using large amounts of bandwidth.
When login problems occur, verify that you are entering the correct username and password. If necessary, follow the recovery steps provided by your NAS manufacturer to regain access to the administrator account. Most minor issues can be solved with simple checks before assuming there is a hardware problem.
Best Practices for Everyday Use
Once your NAS becomes part of your daily routine, a few good habits will help keep your files organised and easy to manage.
- Create clearly named folders for different types of files.
- Remove duplicate files regularly.
- Schedule automatic backups instead of relying on manual copies.
- Review available storage space every few months.
- Keep the operating system updated.
- Organise documents into logical categories for faster searching.
Following these practices makes your NAS easier to use and reduces the time spent searching for important files.
Summary
Setting up a NAS at home is much simpler than many people expect. The process begins by choosing a suitable location, installing the storage drives, connecting the device to your home network, and completing the initial software setup. After creating storage volumes, user accounts, and shared folders, you can configure automatic backups and test file transfers to ensure everything is working correctly.
With regular updates, proper organisation, and basic maintenance, a home NAS can provide reliable storage for documents, photos, videos, and backups for many years. Whether you have one computer or several devices in your home, a NAS offers a convenient way to keep your files organised and accessible whenever you need them.
FAQs
1. Can beginners set up a NAS at home?
Yes. Most modern NAS devices include a guided setup process that makes installation straightforward, even for users with limited technical experience.
2. Do I need an internet connection to use a NAS?
No. A NAS can work within your local home network without internet access. However, internet connectivity may be required for software updates or optional remote access features.
3. How much storage should I choose?
The ideal storage capacity depends on the number of files you plan to keep. Consider your current storage needs as well as future growth when selecting hard drives.
4. Can multiple people use the same NAS?
Yes. Multiple users can access shared folders or individual folders at the same time, depending on the permissions you configure.
5. How often should I update my NAS software?
It is a good practice to check for updates regularly and install them when available. Updates often improve security, stability, and overall performance