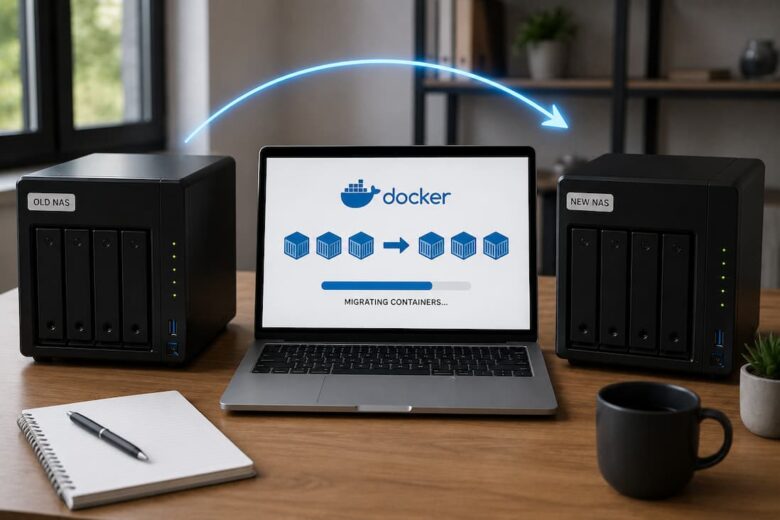
Migrating Docker containers to a new NAS sounds simple until you realize the container itself is usually the least important part of the deployment. The real challenge is preserving persistent data, networking, permissions, and service availability while users continue accessing applications.
Many migration guides focus on copying Docker volumes. That works for offline migrations, but production services require a different mindset. Instead of asking, “How do I copy my containers?” ask, “How do I move my services without interrupting users?” This article explains the decisions behind a successful migration so you can choose the approach that matches your infrastructure instead of blindly following commands.
The Real Goal: Service Continuity Instead of Simple Data Copying
Downtime usually isn’t caused by Docker itself.
It happens because one of these components changes unexpectedly:
- Volume data
- File permissions
- Network configuration
- Reverse proxy routing
- DNS records
- Environment variables
- Database consistency
Containers are disposable by design. Persistent data is not. If your migration plan focuses only on containers, you’re protecting the easiest part to rebuild while ignoring the parts that actually matter.
Understanding What Actually Needs to Move
Before shutting anything down, identify every component that belongs to your application stack.
A typical Docker deployment consists of:
- Docker images
- Running containers
- Named volumes
- Bind mounts
- Docker Compose files
- Environment files
- Custom networks
- Reverse proxy configuration
- SSL certificates
- Scheduled backups
Missing even one of these often results in applications starting successfully but failing in subtle ways. For example, a media server may launch normally while reporting an empty library because the bind mount points changed.
Containers vs Images vs Volumes
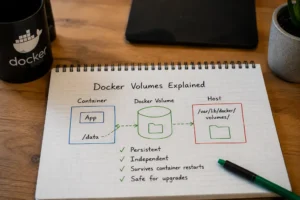
One of the most common misconceptions is treating containers as valuable assets. They’re not. Docker containers are temporary runtime instances created from images.
Your important data typically lives in:
- Docker volumes
- Bind-mounted directories
- Databases
- Configuration files
- Secrets
- SSL certificates
A properly designed Docker deployment should allow you to delete every container and recreate them without losing application data. That’s why experienced administrators focus on preserving persistent storage rather than exporting containers.
Why Docker Compose Matters
If you don’t already manage your deployment with Docker Compose, migration becomes significantly harder. Compose provides a declarative definition of your environment. Instead of remembering dozens of commands, you recreate everything from a single configuration file.
A typical Compose project defines:
- Images
- Volumes
- Networks
- Environment variables
- Restart policies
- Port mappings
- Health checks
This also makes disaster recovery much easier in the future. The documentation explains the syntax correctly but often leaves out an operational advantage: infrastructure becomes reproducible instead of manually assembled.
Planning the Migration Before Touching Anything
Successful migrations begin long before copying the first file. Start by documenting your existing environment.
Questions worth answering include:
- Which applications depend on each other?
- Which services must migrate together?
- Which databases are actively writing data?
- Which applications can tolerate brief downtime?
- Which clients have cached DNS entries?
- Which ports are exposed externally?
This planning phase frequently uncovers hidden dependencies that would otherwise appear only after production traffic switches.
Inventory Existing Containers
Generate an inventory of every running container.
Record:
- Image versions
- Volume mappings
- Bind mounts
- Networks
- Restart policies
- Environment variables
- Port mappings
This inventory becomes your validation checklist later. Many administrators assume they’ll remember these details. Very few actually do.
Check Storage Requirements
Moving data between NAS devices often reveals storage assumptions that weren’t obvious before.
Consider:
- Available capacity
- Filesystem compatibility
- Snapshot support
- Compression
- SSD cache behavior
- RAID configuration
A migration is an opportunity to improve storage architecture, not simply duplicate existing problems. For example, migrating from EXT4 to ZFS changes how snapshots, checksums, and compression behave. Understanding these differences beforehand prevents surprises after deployment.
Verify Network Configuration
Networking causes more migration failures than copying data.
Check:
- Static IP assignments
- VLAN configuration
- Docker bridge networks
- Macvlan usage
- Reverse proxy routing
- Firewall rules
- Port forwarding
Applications may start correctly yet remain inaccessible because one network definition changed. This usually isn’t noticeable until external users begin reporting connection failures.
Choosing the Right Migration Strategy
There isn’t a universal “best” migration method. The right choice depends on workload, available hardware, and acceptable downtime. Three strategies are commonly used.
1. Live Reverse Proxy Migration
This is often the preferred option for production self-hosted environments.
The process typically works like this:
- Build the new NAS.
- Synchronize persistent data.
- Deploy containers.
- Test internally.
- Update the reverse proxy.
- Redirect traffic.
- Monitor logs.
- Decommission the old server.
Because the reverse proxy controls client access, users experience little or no interruption. This approach works particularly well with applications behind Nginx Proxy Manager, Traefik, or Caddy.
2. DNS Cutover Strategy
If services are accessed directly through hostnames, DNS updates can redirect users to the new NAS. The hidden challenge is DNS caching. Even with a low Time-To-Live (TTL), some clients ignore the configured expiration. Reducing TTL several days before migration increases the chance of a smooth transition.
This method works well for public-facing applications but is less predictable inside mixed enterprise or home networks where multiple DNS caches exist.
3. Scheduled Maintenance Window
Sometimes simplicity wins. For database-heavy workloads or applications that perform constant writes, scheduling a short maintenance window provides the safest migration path.
Stopping write activity guarantees consistent volume copies. Although users briefly lose access, the overall migration risk is significantly lower than attempting live synchronization of constantly changing data. Choosing a maintenance window isn’t a failure—it is often the engineering decision that minimizes total operational risk.
Preparing the New NAS
A freshly installed NAS should never become production immediately after Docker installation. Instead, aim to recreate the operational environment of the original system.
That includes:
- Matching Docker versions where practical
- Installing Docker Compose
- Creating identical directory structures
- Verifying filesystem permissions
- Confirming network connectivity
- Testing storage performance
Skipping these checks often shifts troubleshooting from the migration phase into production, where mistakes become visible to users.
Install Docker Engine
Begin with a supported Docker Engine release for your NAS platform. Avoid upgrading Docker at the same time as your migration unless you have already validated compatibility in a test environment. Two major changes at once make troubleshooting much harder because it’s no longer obvious whether failures stem from the migration itself or the software upgrade.
Some NAS operating systems bundle Docker packages that lag behind upstream releases. That isn’t necessarily a problem if your existing Compose stack supports those versions.
Configure Docker Compose
Before migrating workloads, install the Docker Compose plugin (or the standalone Compose binary if required by your distribution). More importantly, verify that the Compose version on the new NAS supports the syntax used in your existing docker-compose.yml files.
Compose files created several years ago may use deprecated options. While Docker often maintains backward compatibility, migrations are a good opportunity to clean up outdated configurations rather than carrying technical debt into a new system. Store Compose projects in a consistent directory structure. Keeping application definitions organized simplifies backups, troubleshooting, and future migrations.
Match User IDs and Permissions
Permission issues are among the most common reasons containers fail after migration. Many containers write data using specific user IDs (UIDs) and group IDs (GIDs). If the new NAS assigns different IDs to users, applications may lose access to configuration files or data directories even though everything appears to have copied successfully.
Before starting services:
- Compare UID and GID values.
- Confirm ownership of bind-mounted directories.
- Verify access permissions on shared storage.
- Test read and write access from inside the container.
Correcting permission mismatches before exposing services is far easier than troubleshooting application errors afterward.
Migrating Persistent Data
The migration process depends on where your data resides. For named Docker volumes, identify their location using Docker’s volume inspection tools. For bind mounts, verify every source directory listed in your Compose files.
Applications that continuously modify data—such as databases, photo libraries, or media management platforms—require additional planning. Copying actively changing files can produce inconsistent datasets that appear valid until corruption surfaces later. Whenever possible, stop write operations before performing the final synchronization.
Back Up Volumes
Never rely on the migration itself as your backup strategy. Create a verified backup before making changes.
An effective backup should include:
- Docker Compose files
- Environment files
- Persistent volumes
- Bind-mounted directories
- SSL certificates
- Databases
- Reverse proxy configuration
- Scheduled tasks or automation scripts
A backup is only useful if it can be restored. Validate that critical files are readable and complete before continuing.
Copy Data Securely
Use a file synchronization tool that preserves permissions, ownership, timestamps, and symbolic links. Many administrators choose rsync because it transfers only changed data during subsequent synchronization passes. This reduces the time required for the final cutover, particularly when migrating large media libraries or application datasets.
If your NAS platforms support snapshots or replication features, evaluate whether they provide a more efficient migration path for your workload. The right choice depends on storage architecture rather than Docker itself.
Verify Data Integrity
Copying data successfully is only half the process.
Verify that:
- Directory sizes match.
- File counts are consistent.
- Database files copied cleanly.
- Configuration files contain expected values.
- Certificates remain valid.
- Application data is accessible.
Some administrators compare checksums for critical files before switching production traffic. Although checksum verification adds time, it greatly reduces the risk of discovering silent corruption after users begin accessing the new server.
Recreating Containers on the New NAS
Once data has been migrated, recreate the application stack using the existing Compose configuration. Avoid manually rebuilding containers with individual Docker commands. Manual recreation introduces inconsistencies that become difficult to document and reproduce later. Compose ensures every deployment follows the same configuration.
Deploy with Docker Compose
Launch the services in stages rather than starting every container simultaneously.
A typical sequence is
- Databases
- Supporting services such as Redis or message brokers
- Application servers
- Reverse proxy
- Monitoring and logging services
This startup order allows dependent services to initialize correctly before applications attempt to connect. Health checks configured in Docker Compose further improve reliability by delaying startup until dependencies become available.
Validate Environment Variables
Environment variables often determine how containers locate databases, authentication services, APIs, storage paths, and external endpoints.
Common migration mistakes include:
- Old IP addresses
- Incorrect hostnames
- Missing secrets
- Invalid API keys
- Changed mount paths
- Expired certificates
Review every environment variable before declaring the migration complete. Configuration errors frequently resemble networking problems, making them harder to diagnose.
Testing Before Switching Production Traffic
A migration should never be validated solely by checking whether containers are running. Running containers do not guarantee functional applications. Instead, verify application behavior from the perspective of real users.
Internal Validation
Before exposing services externally, confirm that each application functions correctly.
Verify:
- Successful login
- Database connectivity
- File uploads
- Scheduled jobs
- Reverse proxy communication
- Persistent storage
- Container logs
- Health checks
Testing only the home page leaves many failures undiscovered until production traffic begins.
External Access Testing
Once internal validation succeeds, test services from outside the local network.
Confirm:
- DNS resolution
- HTTPS certificates
- Reverse proxy routing
- Authentication
- Mobile clients
- API integrations
- External webhooks
Applications frequently work perfectly on the LAN while failing externally due to firewall or routing changes. Testing from multiple devices helps identify caching issues that may not appear on the administrator’s workstation.
Common Mistakes That Cause Downtime
Most migration failures are predictable.
Common issues include:
- Copying live databases without stopping writes.
- Forgetting environment files.
- Incorrect file ownership.
- Missing SSL certificates.
- Port conflicts.
- Incomplete DNS updates.
- Reverse proxy misconfiguration.
- Different Docker Compose versions.
- Hardcoded IP addresses.
- Missing custom Docker networks.
These problems rarely originate from Docker itself. Instead, they stem from assumptions carried over from the previous environment. Recognizing those assumptions early reduces troubleshooting time dramatically.
Recovery If Something Goes Wrong
Every migration plan should include a rollback strategy. The simplest recovery method is to leave the original NAS untouched until the new deployment has been fully validated.
If critical issues appear after cutover:
- Stop incoming traffic to the new NAS.
- Redirect DNS or the reverse proxy back to the original server.
- Resume services on the old NAS.
- Investigate the issue using logs and validation results.
- Correct the problem before attempting another migration.
A rollback plan transforms unexpected failures from emergencies into manageable maintenance tasks.
Verification Checklist
Before declaring the migration complete, confirm the following:
- ✔ All containers are running.
- ✔ Health checks report success.
- ✔ Persistent data is intact.
- ✔ Databases are accessible.
- ✔ Reverse proxy routes correctly.
- ✔ HTTPS certificates are valid.
- ✔ Scheduled jobs execute successfully.
- ✔ File permissions are correct.
- ✔ Monitoring reports healthy services.
- ✔ Backups are functioning on the new NAS.
- ✔ DNS propagation has completed.
- ✔ Users can access services without interruption.
Completing this checklist provides confidence that the migration is operationally successful rather than merely functional.
Next Steps
After the migration, resist the temptation to immediately decommission the old NAS. Maintain the previous environment in a powered-down but recoverable state until you are confident that:
- Backups are running successfully.
- Monitoring detects no anomalies.
- Users report no unexpected issues.
- Scheduled tasks complete as expected.
- Storage utilization behaves normally.
Only after this observation period should the original system be repurposed or retired. Migration is not finished when containers start. It is finished when the new environment demonstrates the same reliability as the old one under normal production conditions.
Conclusion
Moving Docker containers to a new NAS without downtime is less about copying containers and more about preserving the entire operating environment. Persistent data, networking, permissions, DNS, reverse proxies, and validation all contribute to a successful migration. By treating Docker Compose as the source of truth, synchronizing data carefully, validating every service before redirecting traffic, and maintaining a rollback plan, you can migrate with confidence while minimizing disruption to users and reducing operational risk.
FAQs
1. Can I simply copy the Docker container to a new NAS?
No. Containers are designed to be disposable. The important components are persistent volumes, bind-mounted data, Docker Compose files, environment variables, and network configurations.
2. Is Docker Compose required for migration?
No, but it is strongly recommended. Docker Compose makes deployments reproducible, simplifies recovery, and significantly reduces configuration errors during migration.
3. What is the safest way to migrate a database container?
Stop write operations, create a verified backup, perform the final data synchronization, and then start the database on the new NAS. Copying active database files can result in inconsistent data.
4. How can I minimize downtime during migration?
Prepare the new NAS completely, synchronize data in advance, validate services internally, and use a reverse proxy or controlled DNS cutover to redirect users only after testing is complete.
5. When should I decommission the old NAS?
Only after confirming that backups, monitoring, scheduled tasks, and production workloads operate reliably on the new NAS for an appropriate observation period. Keeping the old system available provides a straightforward rollback option if unexpected issues arise.